Guide:Art
Contents
Summary
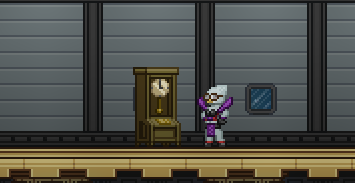
The pixel art in Starbound follows a specific style in order to be consistent. This tutorial is a look into the steps that the official Starbound assets take to be created, as an aid to fan artists, budding sprite artists, and mod creators. For the purpose of this tutorial, you will be taken through the steps to create the Frontier Grandfather Clock.
Getting Started
To create pixel art, you'll need the right software. The Starbound team would recommend Aseprite as it is designed to create pixel art and handles sprite sheets well, though while it is a paid product, a free fork exists named LibreSprite. Other alternatives include the paid software Adobe Photoshop, or the free software GIMP or Paint.net.
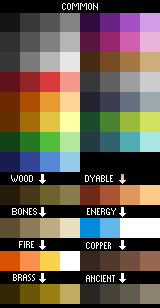
| An image compilation containing most of the common Starbound palettes. |
Palettes
For the most part, all of Starbound's palettes are made of four shades. Nearly all of the assets use the palettes listed to the right - And if you are aiming for creating pixel art that resembles "official" assets, it is advised to stick to these colours. If you want to establish your own palette, try to pick colours that fit alongside these.
Step 1: Defining a shape
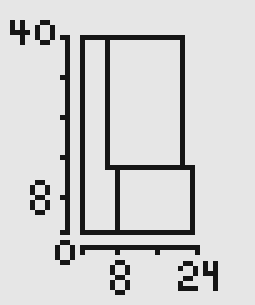
Starbound takes place on a 8x8 pixel tile grid - Every block in the game fits this, and all objects need to comply to fit properly in the world. First we will begin with a rough square shape of our Grandfather Clock, having it fit neatly into 24x40 pixels. This is 5 blocks high - one taller than the player character!
Step 2: Adding Detail
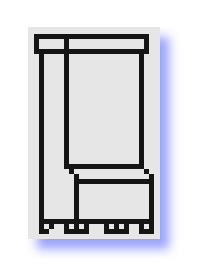
Next we add detail, cutting into the shape of our square to define the outlines of our clock. Here, the bottom has been raised so feet can be added. The front has been adjusted to add a slope, with a rim added to the top.
Step 3: Colour and Shade
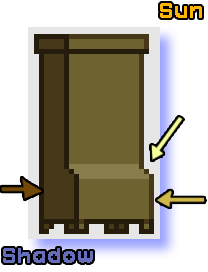
This is the step where we apply the colours from our palette. I'm using the wood palette for our clock. The important thing to remember for shading in Starbound is that all sprites are drawn with the "sun" coming from the top right. Here, we use the four shades like so:
- The first and brightest shade is used for the sloped surface that's facing the top right.
- The second shade is used for any flat surface facing forward - It isn't directly in the "sun", so it isn't highlighted. This is the most common shade on the sprite.
- The third shade is used for the side facing away from the "sun" and as an outline for the previous two shades.
- The fourth shade is used to draw an outline for the areas coloured with the third shade.
All shading in Starbound is done with blocks of colours like this - no gradients or dithering are used!
Step 4: More Detail
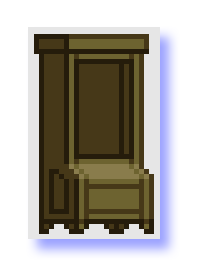
Here, we cut into the front of our clock for the actual clock face and pendulum to go in later. These areas would be quite dark, so we colour them with the third shade and outline them with the fourth.
Step 5: ...And More Detail
Our clock is wooden, and probably wouldn't have been made with a single block of wood. Here, we've added lines that are all one shade darker to define lines where the panels of the clock may have been put together, to make it look really homemade.
Step 6: Adding the Accessories
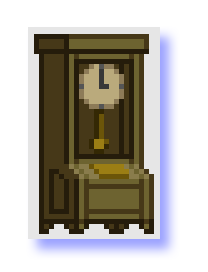
Now we've added the clock face inside, along with the pendulum, and a plaque for decoration. The clock face uses the tan, or bone, palette, whilst the pendulum and plaque both use the brass palette. The pendulum still follows the rules of the "sun" coming from the top right!
Step 7: Finishing Touches
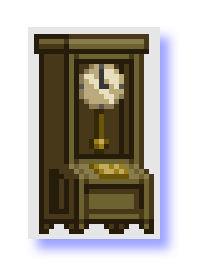
The clock face, plaque and pendulum could all use a little shine to make them stand out, so we've added some highlights shining across their surfaces to make them seem quite reflective. The shading to the end of the pendulum gives it depth and makes it seem rounder rather than flat. We've also added a line of highlight along the rim at the top, to imply that the edge isn't quite square (perhaps it has been worn down over time?) and therefore faces the sun a little. There is also shading to imply that some parts of the detail cut into the bottom of the clock itself. All in all, quite a fancy ornament!

