Modding:BehaviorTrees

|
Cleanup
This article may require cleaning up to meet quality standards or to update information that is out of date. You can help Starbounder by including only imperative knowledge in the article. |
Behavior Trees are used in Starbound to tell NPCs or Monsters what to do.
Contents
In detail
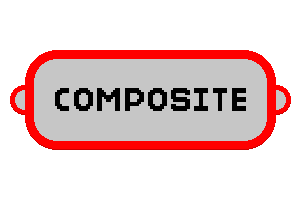
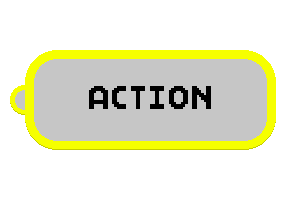
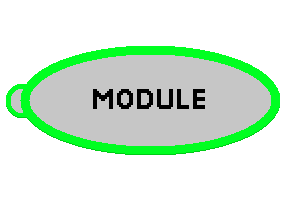
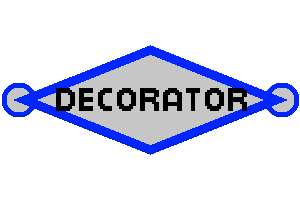
Behavior trees are made up of smaller nodes. There are 4 different types of nodes in Starbound behavior trees: Composite, Decorator, Action and Module. Each node by itself returns either "success", "failure" or "running" as a status. The node may individually configure when it returns "success" or "failure", after it has ended its task. The node is "running", when it didn't finish its task yet.
Composite nodes may have many children and usually are used to initiate a sequence of smaller nodes. Decorator nodes only have 1 child node that does something. It might be useful to modify or do something with whatever its child returns. Action nodes don't have any children. They just do some action and are fully documented in Lua. Module nodes are individual behavior trees, which are called.
Editing Behavior Trees
Behavior trees can be created or edited by writing .behavior files using any programmer's editor. The .behavior files are written in JSON, however, manually reading and writing them is difficult.
An app, the Behavior3 Editor, by Healthire, is capable of reading and writing the syntax of the behavior trees. The app does not provide semantic assistance or validation of behavior trees, but rather, simply converts between the JSON syntax and a visual representation.
Users are warned that the app has not received updates in many years, and requires unsupported and vulnerable versions of Node.js and Electron to run. Instructions for installation and setup are available in the Github repository. More detailed instructions for Windows users are provided below. Caveat emptor.
Behavior3 Installation on Windows
Please note that these instructions have been produced by Windows users and NOT Linux or macOS users. Consequently, installation will differ on those operating systems!
- To set up the coding environment you need to install Node.js and npm. If you haven't had this setup already, get the installer on the official website (npm is already bundled).
- Due to incompatibilities between newer versions of Node.js, Electron, and Healthire's editor, it is important to install Node.js v8.2.1 from 2017. Download the appropriate installer for your operating system (.msi for Windows) and install Node.js as instructed.
- Download Behavior3 Editor on Github. Click the green "Clone or download" button on the right side of the page to download.
- Extract it somewhere, for example:
- C:\Program Files\Behavior3Editor.
- We will return to Behavior3 later. For now, install Electron. It's easier to do it via command line:
- Open the command prompt (cmd.exe). Do this by navigating to an empty directory of your choosing in Windows Explorer, and then on the folder path on the top type cmd and press Enter. If you're unclear, see the instruction here.
- Your command prompt should show the path of directory of your choosing. For example:
- D:\Users\Starbounder\Downloads\ExtractElectron
- Then to download and install Electron, type the line below and press Enter:
- npm install [email protected]
- It is important to install the correct version of Electron - newer versions may not work at all or cause significant display errors! Consequently, the standard "npm install electron --save-dev" command will not work, as this will install the latest version of Electron.
- Once finished, in your chosen folder navigate to \node_modules\electron\dist. Inside should be many files with one electron.exe.
- Copy all of those files inside that directory.
- We return to the Behavior3Editor folder. Paste them to the Behavior3Editor\Electron\ folder.
- Run \Electron\electron.exe inside that directory.
- Go to File -> Import nodes...
- Find your nodes.json file and open it. You can use this Starbound nodes.json for an example.
Using the Behavior3 editor
The GitHub page of this editor should have already taught you how to import nodes into the editor. You can now open an already existing .behavior file or work on your own.
In the "File" drop down menu at the top of the editor, you may find "Open/New Project" and just "Open", "Save", "New Tree". The simple "Open", "Save" and "New Tree" options simply refer to the current behavior tree you're editing or may want to open. To open an existing behavior file, just go to "File" > "Open" and find your .behavior file. Starbound vanilla assets, once unpacked, have their own "project", which actually gives you an alternative way to open the existing nodes - You may go to "File" > "Open Project" and select the .behavior-project file. The .behavior-project file itself points at the folder with all the .nodes files, which all describe nodes for all specific categories. In fact, nodes.json file that you are asked to import is just the collection of all .nodes files put into one JSON object.
You have an option to create your own .behavior-project file and put all your nodes and the .behavior-project file itself into a separate folder, but it might be risky, because there's no way to tell which project a .behavior file would belong to.
Controls
To drag the "node map" of the tree, hold your middle mouse button. You may zoom out or in by scrolling the mouse wheel. Note that the zooming out or in focuses on the Root node, which exists in every behavior tree. Using the left mouse click you can select nodes or multiple nodes.
On the left side of the editor, you will see a list of nodes, once you've opened up your nodes.json file. However, there are keywords "Nodes" and "Trees" on top. The "Nodes" menu is selected by default and shows all the nodes available to be used. You may select a node from that menu and drag it into the behavior tree. There's also the "Trees" menu. It lets you view all opened behavior trees. By default, when you open the behavior3 editor, it already opens a new empty behavior tree, but it isn't that used. Once you create new trees or open different ones, they all get added to that list, making it easy to navigate multiple behavior trees, without the need to open multiple instances of the Behavior3 editor. The button "New Tree" creates the same empty new tree for you.
(Note: Sometimes, when opening new empty trees, you might not see the default "Root" node. Don't drag the map around and just insert another node. Everything will get fixed then.)
Node Documentation
Each single node in vanilla has its own function. You may create your own ones. Tutorials on that are below.
Creating Custom Nodes
Custom nodes are created by creating a new .nodes file(or editing one). Inside the .nodes file, each JSON object represents a single node.\
.nodes key-value pair documentation of a single node object:
| Key | Data Type | Description | Is it required? |
|---|---|---|---|
| type | String | Represents the node type. May only be set to "action", "composite", "decorator" or "module". | Yes |
| name | String | The technical name of the node. The lua function that represents this node should have a matching function name. For module nodes, this should match the .behavior ID in order to work. | Yes |
| title | String | The title of the node displayed in Behavior3 Editor. You may leave it empty in the .nodes file, which will make Behavior3 Editor display it's technical name instead. | Yes |
| properties | Object | An object containing parameters to set for the node in the editor. These parameters are then sent to the Lua function through the first argument, which is a table and has these parameters as its children. Inside of this object, there are key-value pairs, where the key is the property name(in Lua and Behavior3), which is also set to an object. That inner object contains 2 key-value pairs, of which the first with the key "type" is set to the data type this variable should be and the last with the key "value" is the default value set, once you create this node in Behavior3 Editor. Please remember that this is still a .nodes file and it is in JSON. In fact, Behavior3 Editor also ONLY accepts JSON objects or arrays. Those are NOT Lua tables! They are only Lua tables inside the Lua script! | Yes |
| output | Object | An object.(I have no clue how behavior tree nodes send outputs to each other, other than their state. If anyone knows how the hell this works, please contribute!) | No |
| script | String | The path to the script that handles this node. This value is only necessary for action nodes, as decorator and composite nodes are set in a specific file and nothing else. | No |
| category | String | Optional value for action nodes. For it to be easier to navigate, action nodes are all put into categories. There are a few without one - they are found directly at the start of the Action node list. | No |
After you've created this .nodes file, save it under the "nodes" folder, as a part of the main Starbound behavior "project". If you want, you may create a folder and make your own project there, while copying all vanilla and yours .nodes files. Nothing will be damaged, Starbound will likely still use its own vanilla "project".
Finally, if you've created a node, you need to define whatever it does. Create a script(if you are creating a module node, you don't need to do any Lua), as you've defined for the "script" key and create all functions for your corresponding node names. There are a set of arguments always given to each single node Lua function. First argument is a table containing all previously passed JSON parameters, configured within the node with the editor. Second argument is a board, which is rarely used and is a userdata variable. It contains some methods you may find get used in vanilla.(The writer(s) of this page doesn't/don't know what methods it contains and what they do) Third argument is the node ID in the behavior tree(?). And finally as the forth argument, script delta is passed(usually named "dt"), which is the amount of seconds an interval lasts between firing nodes again.
If you've patched a vanilla .nodes file to add a new decorator or a composite file, you'll be forced to dirty edit the vanilla Lua scripts.