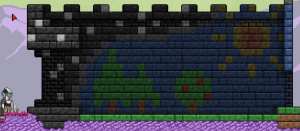
Colorization
Colorization is the process of changing the color of clothing and materials. For clothing, this is done using dyes, and for materials, the Matter Manipulator has a paint mode.
Dyeing
Dyeing is the process of recoloring clothing (including armor and back items such as EPPs) with different dyes, which are crafted at the spinning wheel or sewing machine with an empty bottle and various materials.
To apply a dye, select it in the inventory and then right-click the piece of clothing while holding the dye. Dye can be removed with dye remover, which is applied in the same way as dye. Clothing that has already been dyed with a specific color will not use up the same color dye if right-clicked again.
Painting
Painting is accessible using the paint mode of the Matter Manipulator, provided the paint upgrade has been acquired. With this mode you are able to recolor most block types. To use paint mode, click on it in the second slot in the middle of the toolbar or use the hotkey, which defaults to Y. Each right-click will cycle through colors in the order of red, blue, green, yellow, orange, pink, black, white, and lastly a color remover that will return a block to its original color.
By default paint mode paints a 3x3 array of blocks; to paint individual blocks hold the shift key while in paint mode. Paint mode applies paint simultaneously to both the background and foreground blocks. To avoid painting a background block, you must mine it, apply the paint to the foreground, and then re-place the background block.
Paint mode cannot affect blocks that are shielded.
Dungeon Creation
When creating spawnable dungeons using the Tiled editor, blocks can be painted in one of the eight paint colors. To do so, switch to one of the object layers (preferably one named something apt, such as mods) and use the Insert Rectangle tool to create a rectangular region over the blocks to be colored. You will need to add two or three Custom Properties to this rectangle. The front property is set to the internal name of the foreground block type to be colored. Likewise, the back property is set to the internal name of the background block type to be colored. Only one of front or back is required, but both may be specified to paint both layers. Finally, the colorVariant property is set to an integer 1 through 8, indicating the color to be applied; 0 is also permitted, but it is equivalent to not using a colorVariant rectangle at all.
| colorVariant Value | Color |
|---|---|
| 0 | Default color |
| 1 | Red |
| 2 | Blue |
| 3 | Green |
| 4 | Yellow |
| 5 | Orange |
| 6 | Pink |
| 7 | Black |
| 8 | White |
If the region to be colored is not shaped like a rectangle, you will have to clone the rectangle, possibly many times, and adapt the position and sizes of the rectangles to cover the desired region. If you wish to paint the foreground and background blocks different colors, you will need to use two different sets of colorVariant rectangles.
Note that, if the front or back parameters are specified in a colorVariant rectangle, and they differ from the foreground or background block types under the rectangle in the Tiled file, the block types specified in the rectangle will take priority and will be what spawns into the world.
Early Development
Objects were originally intended to be colored similarly to blocks. Some objects added during the early beta still contain remnants of this unimplemented feature, in the form of unused image assets colored in each of the eight paint colors, in addition to the default color. Newer objects do not contain these additional assets, indicating that Chucklefish likely do not plan to revisit the feature.


